
This post may contain affiliate links. If you use these links to buy something we may earn a commission. Thanks.
Using your mushroom plugs correctly will impact the success of your mushroom logs. This complete guide includes 10 detailed steps on how to use your mushroom plugs for the best return on investment.
It starts with a proper choice of wood (type and quality), having the right tools for the job, and understanding how mushroom mycelium plugs work!
Once those are covered, you’ll learn the detailed steps of actually inserting and sealing plugs into your logs for the best results.
In general, to use your mushroom plugs, you’ll need to drill holes into a healthy log, hammer in the plugs, and seal the plugs and log faces with food-grade wax. The right wood and proper tools make all the difference in this process.
We’ve used thousands of North Spore mushroom plugs on hundreds of logs, so you’ll also find many experience-based efficiency tips in this post.
Since we use and love North Spore mushroom products, we use affiliated links in this post. You’re welcome to use our coupon code QUALITYSPAWN for a discount if you need to make an order.
Related: What it Costs to Grow Mushrooms (Indoor vs Outdoor)

How Mushroom Plugs Work
Before using your mushroom plugs with just any log, it’s vital to understand how they work.
Mushroom plugs work best on 2-3 week-old wood, cut fresh from healthy hardwood trees. The plugs are colonized by the mycelium of your chosen mushroom species and when plugs are put into a log, they continue to expand and colonize the available wood. When conditions are right, mushrooms will fruit.
Different mushrooms fruit in varying conditions based on the preference of the species.
See: 9 Best Mushrooms to Grow on Logs (From Easy to Hard)
1. Identify the mushrooms’ wood type preference
Each mushroom strain grows more or less rampantly on different types of wood. For a higher return on investment, you’ll want to choose a specific wood type for the mushroom strain you’re using.
| Mushroom Strain | Best Wood Choice | Good Wood | Worst Wood |
| Shiitake | Alder, Beech, Maple, Oak | Basswood, birch, maple | elm, cherry, ash, aspen, pine |
| Oyster | Aspen, Cottonwood, Maple | Basswood, beech, birch, maple | Oak, ash |
| Lion’s mane | Beech, Maple | Alder, birch, walnut, elm, oak | Hemlock, pine |
| Chestnut | Aspen, Beech, Birch, Maple, Oak | Ash, alder, basswood, elm, willow, | Hemlock |
| Chicken or Hen of the woods | Oak | NA | Everything but oak |
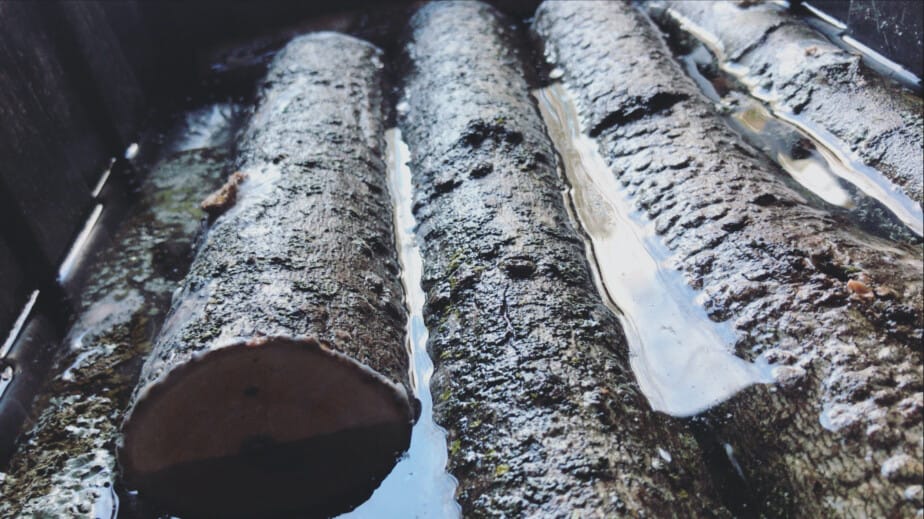
2. Select healthy trees to harvest
For bountiful long-term mushroom harvests, you’ll need fresh-cut logs from healthy trees to insert your mushroom plug spawn into.
See: How to Identify & Select Wood for Mushroom Logs (With Pics)
Once the logs are harvested you’ll need to set them out of direct sunlight where they can partially dry, and the live sap can drain.
When do you cut trees for mushroom logs?
The time of year you cut logs for your mushroom plugs can make a difference in the quality of logs you end up with.
The best time to cut trees for mushroom logs is from fall to late winter while the trees are dormant. The worst time is in spring when the leaves are receiving all the nutrients for leafing out.
We avoid cutting wood from mid-April to mid-June here in zone 5, as buds begin to swell and leaves are growing in.
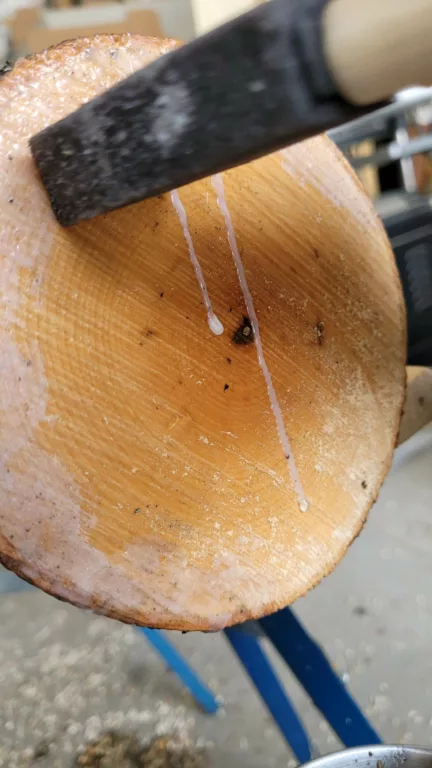
3. Inspect the log quality before committing
In 2-3 weeks your logs will have cracks in the face that look like this:

And you’ll know they are ready for drilling—Not too alive (“green”), and not too dry.
The bigger the cracks, the dryer the wood. You want moisture in your logs as mycelium needs water to live. Logs that are left longer than 4 weeks will need to be soaked 12-48 hours prior to plugging.
In general, you’ll want the cracks in your logs no bigger than the thickness of a dime.
The point in waiting 1-3 weeks after cutting your tree is to allow the sap to drain from the logs. Sap is an antifungal juice that you don’t want for your precious plugs.
But before you commit to every log, inspect each one prior to plugging.
This video explains essential elements to look for in each log to ensure your mushroom plugs don’t go to waste.
What are the best logs to use for mushroom plugs?
Using mushroom plugs effectively is a matter of finding the best logs for them. Several factors make up the best logs, and to summarize them:
Fresh-cut and healthy hardwood tree species in their dormant state make the best logs for all mushroom plugs. Most mushroom strains produce the greatest fruit from oak or hard maples as dense wood offers long-lasting nutrients. Softer hardwoods will yield mushrooms sooner, but for a shorter time.
The best logs will give you the best bang for your buck, time, and effort. Since mushroom logs are a long-term ‘sport’ it’s well worth making the best choices now for more joy later.
Now that you’re set with healthy logs, we need a functional processing space.
4. Set up an inoculation station with good tools
The tools you have, make all the difference between hating or loving log inoculation.
The first time we did it, we didn’t have a mallet hammer, or a depth stop, and used a tea light candle to melt our wax.
- A hard-head hammer increased the risk of bark damage and also flattened and smooshed the tops of our plug spawn dowels. When the tops fanned out like a mushroom cap, the plugs wouldn’t go in any further.
- The absence of a depth stop slowed us way down trying to get the depth ‘right’ using tape as a marker. As a result, our muscles fatigued faster, our depths were inconsistent, and we got frustrated at how difficult it became after a short time of working.
- The tea light candle wasn’t actually too bad. It did the job, but the portable propane camping cooker made it a lot easier and quicker to melt wax when needed.
To set up a high-functioning mushroom plug inoculation station you’ll need 4 distinct “spaces.”
- A pallet or clean area to keep your ready logs
- A couple saw horses where you’ll drill, plug, and wax the logs
- A safe area to melt the wax and set the drill down where they won’t be knocked over
- A pallet to place your finished logs
On our sawhorses, we put 2 logs on the sawhorses at a time and use 4 lengths of wood, as wedges, to keep them from rolling around.

In the middle, with a wider piece of wood, you can use it as a table to house the mallet and plug spawn for easy access between drilling and waxing.

The ‘burner’ table is to the side of the main workstation. On it, we have the portable cooker, the wax, a pot, and a disposable paintbrush. The drill can be safely set here and not on the sawhorse ‘table’ so it doesn’t accidentally drop to the floor from the hammering.

How deep to drill for mushroom plugs?
Holes for mushroom plugs need to be deep enough for plugs to hammer them in all the way. But drill the holes too deep, and you’ll waste a lot of precious sapwood.
An 8.5mm drill bit with a 1 1/4 inch depth stop will create a hole with the right width and depth for mushroom plug spawn. You can either mark the depth on a regular drill bit with tape, but if you’re doing more than a few logs, you’ll wish you had the proper depth stop.
A proper depth stop completely changed our speed and eased performance with plugging logs. Now that we have one, we wouldn’t go back to the days without one, as several issues have been eliminated.
It even takes the sawdust out of the hole, so the plugs go in easily.

North Spore, at the time of writing, is offering 20% off their depth stop drill bits. If you’ve missed the sale, you can still use our code: QUALITYSPAWN at checkout. I recommend buying it along with an order of plug spawn to save on shipping.
Now that you’ve got your station set up with all the appropriate tools, you’re ready to drill.
5. Drill holes into your logs
The more holes you drill, the more plugs you’ll use. The more plugs you use, the quicker your log is colonized. If you’re less about instant gratification these days, a little longer wait and using fewer plugs per log could mean more mushrooms.
How many mushroom plugs per log?
The number of mushroom plugs you put into a log varies by the size of the log. The length and thickness will determine the number of plugs you should use.
The average length of a mushroom log is about 4 feet. The average width of a mushroom log is 4-6 inches.
An average-sized log is given 40-60 mushroom plugs. That’s about 10 plugs per foot of length. The more plugs you use, the faster your log will colonize. The fewer plugs you use, the longer it will take to see fruit, but you’ll create more mushroom logs and yield more fruit long term.
Confidence in using fewer plugs per log comes with experience and confidence from success.
Use an appropriate amount of plugs in alignment with the number of logs you have ready to inoculate.
It’s best to use up a full bag of plug spawn once opened.
How do you space mushroom plugs?

Spacing mushroom plugs is simple as it doesn’t need to be perfect, and is easy to eyeball.
First, drill your rows with 6-inch spacing. Your second row should be offset and 3-4 inches away from the first. You’ll end up with a diamond pattern as shown below.
If you want uniform and accurate spacing, use a popsicle stick or anything similar to measure the distance between your holes as you drill.
6. After drilling two rows, plug & seal right away
For an efficient and clean workspace, I recommend plugging and sealing right away after drilling holes. Avoid drilling in batches, plugging in batches, then sealing in batches.
We usually work on 2 logs at once; drill 2 rows on each, plug all rows, wax all rows, and then turn the log for the next pair of rows. This workflow minimizes the need to ‘move’ the heavy logs and saves the most amount of time.
It would take you more time to drill all the holes in a log, plug all the holes, and then wax all the holes; you’ll be turning the log more than necessary, and wasting a lot of energy and time.
So insert and hammer your plugs into the holes, and move on to the next step. Then turn your log, and repeat!
7. Seal the plugs and log faces with wax
Wax certainly adds to the startup cost of making mushroom logs, and so I also wondered if it was essential or not to the success of the project. Rather than risking my own mushroom logs, I did some digging around with experienced mushroom log makers for answers.
Sealing mushroom plug spawn is vital for a successful mushroom harvest. Without the wax, the plug spawn will dry out, and without moisture, will die. You’ll also need to seal the cut faces of the log so your log retains needed moisture. If your log dries out, your mushrooms won’t thrive.
The purpose of sealing your mushroom logs is to retain moisture and close the door on competing wild mushrooms.
Much of your reward will go to waste if you don’t wax all the wounds on your logs.
What kind of wax do you use for mushroom plugs?
Mushroom logs can’t easily or safely be sealed with tape, plastic, or just any airtight object. Natural food-grade waxes such as soy wax or beeswax are used to seal mushroom logs.
Soy wax is the most practical and common choice as it’s cost-effective, quick to melt, and easy to work with. Buying soy wax in bulk is cheaper than small amounts. Soy wax melts at 185*F and in a heated cast iron pot stays melted for prolonged periods making it easy to seal your logs.
Beeswax is costly so is rarely used in place of soy wax.
How do you seal mushroom logs?

The process of how to seal mushroom logs is quite simple and requires just a few tools.
Using a pot and source of heat, melt any food-grade wax, and with a paintbrush, dab all mushroom plugs to seal them in, and paint the faces of the logs. The wax will seal in moisture, providing stable growing conditions for the mycelium and reducing the need for manual watering.
Heat can be generated by a small candle, portable propane cooker, or on the kitchen stove.
Candle heating is slow and doesn’t keep the vessel very hot, so the wax cools much quicker than convenient.
If the kitchen is all you have, I recommend using a cast iron vessel to bring the melted wax to your inoculation station. The cast iron retains heat keeping the wax liquid for longer.
8. Store unopened or unused mushroom plugs
Once you open the bag containing your mushroom plug spawn, it’s best to use it all up in your logs. So hopefully you have at least more logs rather than not enough.
If you do have leftover plugs you could put them into any other substrate such as sawdust or woodchips and experiment with the outcomes.
As a rule, we only open up one mushroom strain type or bag of plug spawn at a time to avoid competition through cross-contamination.
We have leftover shiitake plug spawn from our last batch of making mushroom logs, and since we are cutting more trees down for fresh logs, we decided to close the bag and put it in the fridge, and use them up in 2 weeks.
Do mushroom plugs need to be refrigerated?
Mushroom plugs need to be properly stored between the time you receive them and when you’re ready to use them.
The refrigerator is the best place to store unopened or opened bags of plug spawn. The cool temperatures keep the mycelium alive but growing slowly. The plugs are like mini-logs, without the cold temperatures, they’ll consume the plugs at a much faster rate, and actively lose their energy.
Plugs will be fresh for use a lot longer when kept in the cold.
Most vendors recommend using your plugs within 6 months, when in the fridge, for best results. It’s best to use them as fresh as possible but the maximum time you can stretch the storing time is up to a year. Any longer, and the success-rate risk isn’t worth the work and fresh wood.
Can you freeze mushroom plugs?
We ordered mushroom plugs very early once and wondered if freezing them would make them last even longer, as we weren’t ready to use them. Rather than going ahead and doing it blindly, we asked experienced mushroom growers first for an answer.
Freezing plug spawn kills the mycelium. The freezer won’t make your plug spawn live longer but rather die very quickly. Keep your plug spawn in the fridge, and never let it freeze. Ensure your fridge doesn’t go to freezing temperatures either—This can damage portions of the spawn.
9. Stack finished mushroom logs in a good spot
Mushroom logs can be stacked in several ways. First and foremost, you’ll want to pick a stack based on the stage your log is at.
I don’t recommend open stacks for logs that aren’t fruit yet. You’d be asking for a lot of unnecessary manual watering.
After we finish plugging fresh logs, we stack them all together on a skid close together under a tree canopy. We cover them with permeable fabric or fronds. They receive rain, bright light, and a bit of dappled sunlight in a mostly shaded area.
The location is also important because you want your logs to have access to water and shelter from the sun at the same time. This environmental combination lowers their maintenance needs while you wait for them to finish colonizing.
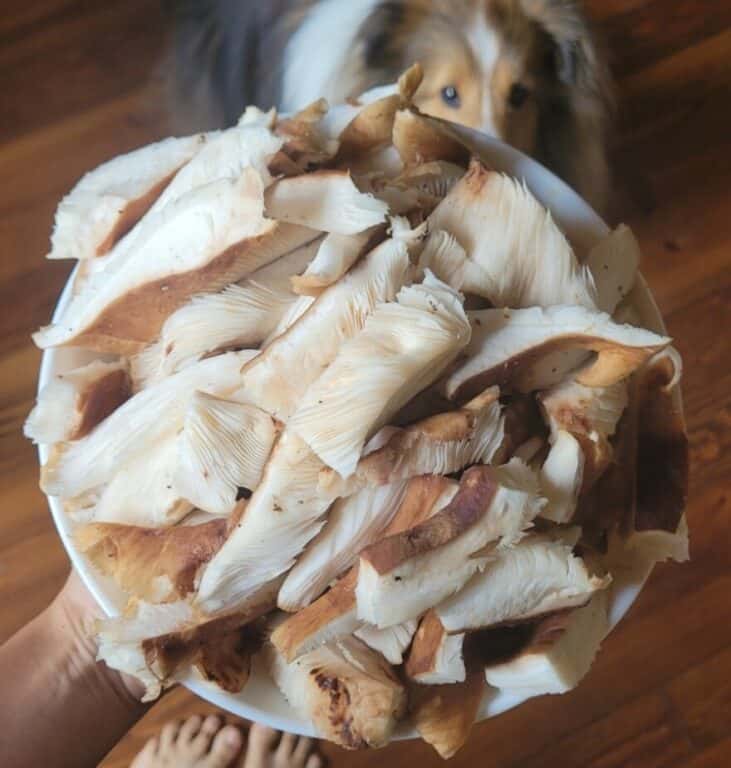
10. Enjoy bountiful harvests for years to come
Once you begin to see fruit, you’ll change the stacking formation and can consider ‘shocking’ your logs to induce fruiting regularly.
Up Next: Essential Tools to Make Mushroom Logs (Complete List)
Recent Posts
There’s no shortage of full-sun ground covers for zone 4 climates! Each plant in this list can withstand the frigid temperatures and also enjoy the hot sun in summer. Full sun means that a plant...
There's no shortage of full sun ground covers, not even in zone 3! Zone 3 climates offer hot but short-lived summers and very cold winters. So each plant in this list can withstand the frigid...