
This post may contain affiliate links. If you use these links to buy something we may earn a commission. Thanks.
Your approach to preparing the ground for a food forest will (and should) vary based on the soil type that you have. No single approach is necessarily the best for your conditions.
If you don’t shape your ground into a proper foundation for your permanent food forest you’ll run into big, even unfixable problems later.
The foundation is everything.
Our fruit trees have paid the price of our mistakes in not taking the steps in this post. Our property has a wide range of flat areas; slopes, clay, silt, and sand on it. We’ve experienced plenty of scenarios, and tragedies, and have had to fix and redo several things from our oversights.
To prepare your ground for planting a food forest; we need to assess our soil texture and terrain, first, to ensure any issues are addressed and alleviated before investing in the rest of the project.
Related: Does sheet mulching really work? When it does (and doesn’t)
Identify your soil type by texture
Assess your soil by estimating its texture. The texture will depend on the ratio of particle sizes between sand, silt, and clay.
For a simple explanation and demonstration of what to do; follow this video.
Sand has big particle sizes. Sand tends to drain well, but lacks nutrient retention since water can flow in and out quickly.
Clay is the opposite! Its very small particle sizes retain most of its nutrients since water tends to sit and take a while to enter let alone leave. When compacted and lacking in organic matter it basically drains as poor as pottery.
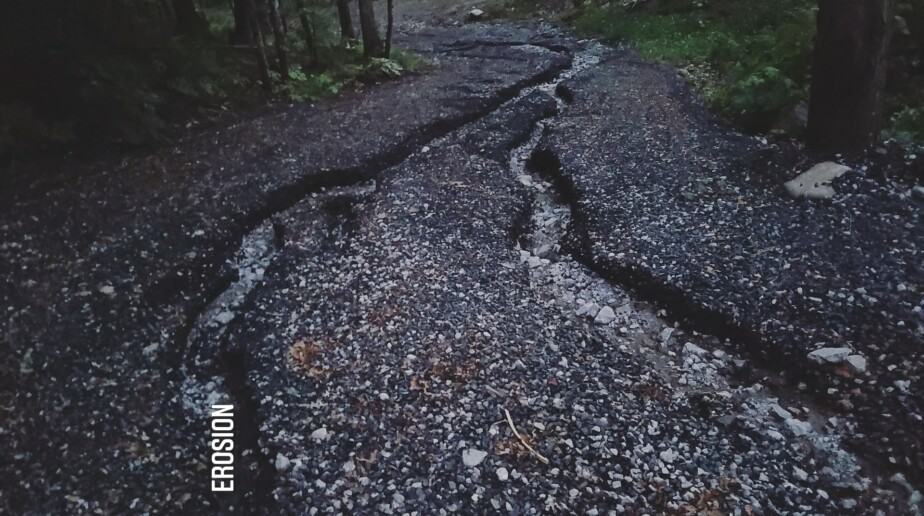
Silt is the in-between size. Since silt accepts water and drains, but drains less than sand and more than clay, it’s easily carried away by water (and most susceptible to erosion).
Assess the slope of your terrain
The best remedy for the given soil texture also depends on your terrain.
Will you be planting on flat ground or sloped?
It may or may not be obvious, but it is a crucial decision to get right.
Any slope greater than 15% will need to be formed into terraces for erosion prevention.
- This is the basic math for calculating your slope.
- To find the elevations, refer to this free online tool, and follow these instructions.
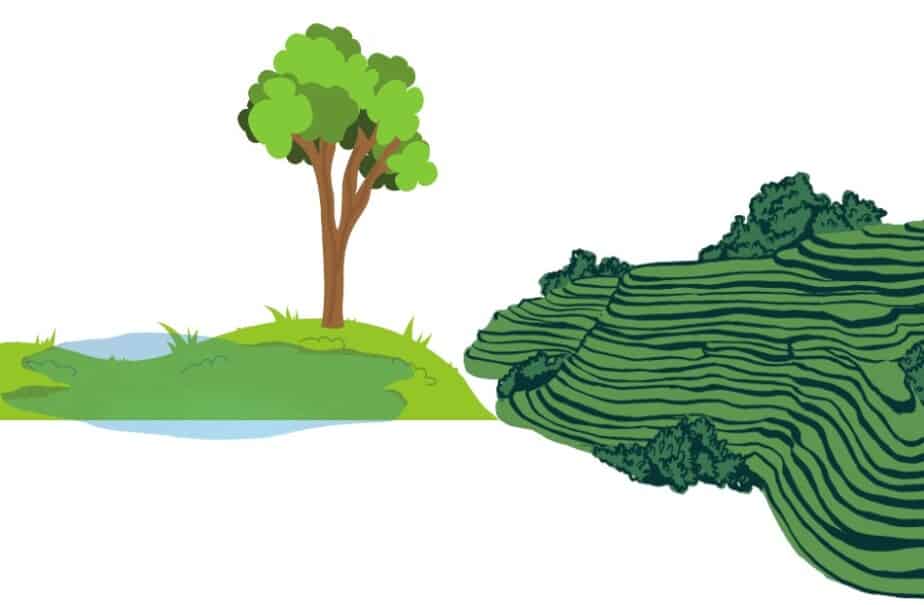
Terraces are like steps of stairs but scaled and shaped to the contour of a hillside.
Choose the right remedy
Once you know your soil texture and slope you can decide whether to do:
- terraces,
- swales,
- or nothing!
If no remedy is needed and you have soil that drains well on a flat plot; move to the next steps.
If your soil is poor-draining and the ground is flat; swales are your best option (see the image below). Swales rely on proper contouring to work effectively and doing it right the first time will save you from irreplaceable costs later.
See: 5 Phases to Create Well-Drained Clay Soil for Growing Food
If your soil is very sandy and well-draining; consider testing your soil for nutrient content (as an option), but more importantly; follow this helpful post about amending sandy soil.
Whether your soil is well-draining or not, and on a steep slope; terraces are the right remedy.
Even in the most exquisite soil and fresh mulching, our fruit trees dried up and died being planted on a slope that we didn’t turn into terraces.
Swales might seem counter-intuitive to poor-draining soil in the sense that a swale is capturing and storing water. You’d think you want it to run off, away, and “drain,” right? Well, drainage really means “soaking” down into the ground. We do not want water running across the surface and flooding low areas of the greater landscape.
Swales must be partnered with appropriate trees and plants that will break up the soil, and allow water to become absorbed, used, and purified on its way down to aquafers.
The biggest mistake you’d make with swales is putting them on a slope greater than 15%. Swales are meant for surfaces flatter than a 15% slope. Swales plus hills equal a recipe for landslides—worsening erosion.
Terraces are appropriate for hills because the flats allow water to sit and absorb, but excess water is not stored, rather it runs off to the next step and so on to the bottom. Since excessive water isn’t held back by a mound of soil; landslides aren’t encouraged.
Map out the contours of your landscape
You’ll need to map out contours for both swales and terraces. From there, the shapes of a swale and a terrace are different (as shown above).
The “contours” are the invisible but level lines that draw across the slopes. The “slope” is the line that a toboggan would make when you sit on it and ride it down the hill. The contour is perpendicular to that.
Without contours; your terraces would be like wavy, uneven boards on a staircase, and your swales would have lips or dips like a pitcher does for pouring liquids accurately into a glass. If you’re still confused about designing your food forest “on contour” do leave a comment or send me an email. I was confused about ‘exactly’ what it meant for a long time.
Finding the contour is quite simple with an A-frame and a level measure. Phil from permaculturePA shows and explains his A-frame level and demonstrates how to use it on your landscape to find the contours.
For the technically inclined people here; chapter 4 of this book goes over the mathematical details of interpolation and slopes. To buy the book Site Engineering for Landscape Architects it’s cheaper here.
Clean up the site and collect useful debris
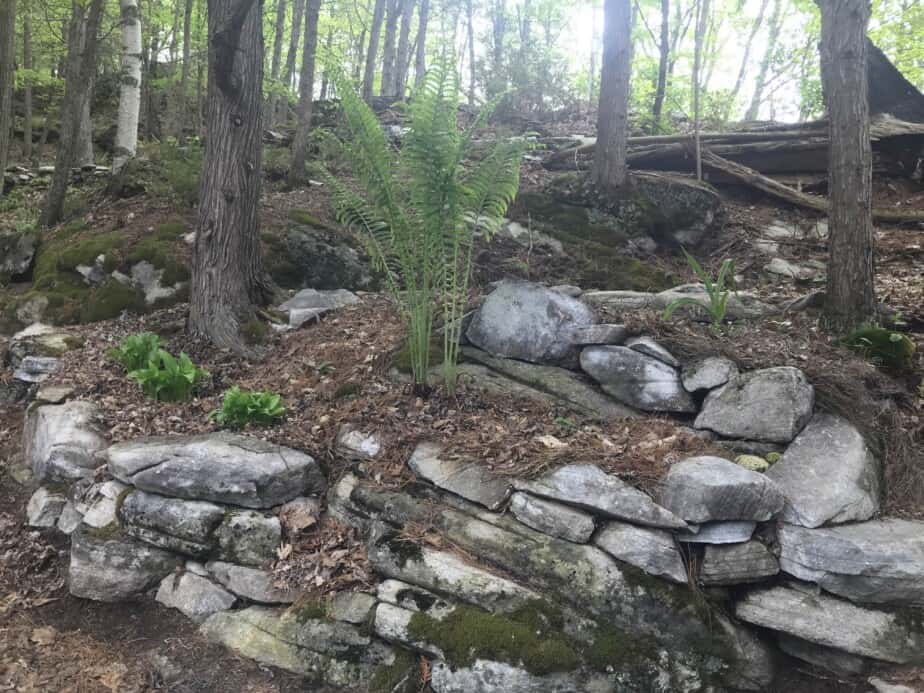
Before you take action on your land; collect and set aside any rocks, logs, brush piles, leaves, and any other useful pre-existing materials. All these materials can later be added intentionally for visual interest and safe spaces for helpful creatures of all kinds.
As we dig around and work, we continue to set aside rocks as we find them. They are a useful element to add to your food forest layout and are free because you already have them! So don’t bury them if you’ll use them.
Leaves, logs, and wood can all get buried, but once again, maybe you need mulch, or compost to protect the soil after all this work. Leaves are an easy and free mulch to put aside and layout when done with the hardscape.
Not sure what to do with the materials?
See: How to Grow a Food Forest for Free and Cheap
Shape your land the way it needs shaping
If your land demonstrates no drainage or erosion issues, you’re free to head to the next step.
If you need swales to improve clay; get out your pitchfork to dig out a water bed (following your contour) and pile up a berm for planting on.
If you need terraces to avoid erosion on slopes; get out your rake, face the uphill, “cut” the hill on a contour, and drag the excess dirt downward to create a “stair step.” Keep terraces shorter if possible. The taller your terrace, the stronger the retaining wall needs to be.
Build retaining walls with logs, lumber, brush, bricks, or rocks.
If your land is very sloped and seems to require professional services to get the job done correctly, it may be worth consulting a local landscaper for advice or hiring for the project.
Eliminate weeds and prevent them long-term
To plant the food we want we’ll need to rid of the plants that aren’t useful, perhaps for you, it’s a big turf of grass.
The easiest way to start fresh is with sheet mulch.
But before we sheet mulch it’s vital to remove and even edge the area to prevent persistent weeds from thriving.
Quackgrass, for example, can live here and grow far, far away under the ground in the dark until it finds a tiny hole in the light way over there. Next thing you know, your food forest is covered in grass. Leslie and Aaron from Whole Gardens NW knows all about this!
Sheet mulching still works and is proven beneficial as explained by the University of Guam. We just need to, once again, create a solid foundation. We can’t afford to take shortcuts when it comes to prepping the ground for our forest gardens. The time and effort we give the ground will mean everything for the longevity of our results.
If you can, rent some goats before ripping up and removing sod or existing plants. As they eat your space down to nothing they fertilize the area with manure!
- We save fuel,
- gain passive manure,
- and have to do less manual plant removal.
- But we’ll still need to remove the root systems of persistent weeds.
Goats are great for mowing down a large space. We prefer this overhaul method for large open spaces where we know we want a whole forest garden. The pathways, however, seem harder to “find” when resetting a bulk area all at once.
Maybe it’s better if you start with a small area at one time. We prefer this when planting forest gardens inside the forest, but it can be the preferred method for any setting.
For clay settings that require mounding up rather than planting in—this is also a more manageable option.
Rather than sheet mulching your entire expected food forest—manually (and thoroughly) remove the weeds of one bed on contour, and install edging to prevent persistent weeds from entering the bed.
This works well for keeping grass pathways while keeping competitive grasses outside the forest garden beds.
Related: What kind of material is best for sheet mulching?
To sheet mulch a well-drained area:
- Water the ground thoroughly
- Add organic matter such as compost and aged manure if you have the means
- Soak your chosen sheet materials in a tub if possible
- Lay soaked materials on top of weed-free well-drained soil
- Cover with an organic mulch of choice such as woodchips
- Cut holes to plant what you need when you need
- Maintain mulch layer to suppress weeds

This article was originally published on foodforestliving.com. If it is now published on any other site, it was done without permission from the copyright owner.
To sheet mulch a water-logged landscape:
- Water the berms of your swales thoroughly
- Add organic matter such as compost and aged manure if you have the means
- Soak your chosen sheet materials in a tub if possible
- Lay soaked materials on top of weed-free berms
- Plant a living mulch of diverse cover crops where possible and mulch around trees
- Allow living mulch to cycle through its lifespan, leave all roots where they are, add organic mulch on top, or reseed a new living mulch
Plant trees to support the landscape
Trees are a big part of successful ground preparation, especially in erosion-prone areas, and poor-draining areas. Without trees holding things together or busting through compaction—your forest garden is at risk of washing away or growth stunting.
Planting trees are one of the last steps to ground preparation but are key to include sooner than later as part of your ground preparation plan.
Ensure you plant enough trees that are appropriate for your needs.
For erosion-prone areas; plant a pioneer overstory with trees that have shallow and widespread roots that grow happily in your general area. Then mix the desired fruit trees into the understory.
For water-logged areas; plant pioneer trees that are strong enough to penetrate compaction and have deep roots. Then mix the desired fruit trees into the understory.
To plant your trees in sheet mulch:
- move the mulch aside to one pile
- cut an X as wide as the hole needs to be
- fold the corners back, hold them down with rocks if needed
- dig your holes in a way to keep the soil layers separated; the organic layer is scooped into one pile, native topsoil is scooped into another pile, and subsoil scooped aside
- Plant your trees and shrubs with roots trimmed and spread as needed
- replace the soil in the same order it was found
- water to remove air bubbles, tamp the soil so its firm, lay sheet mulch back over, and spread mulch back over
All these steps sound like time-consuming efforts because they are! But they are all worth more than you know to have it done properly.
You won’t regret doing it properly, but you will regret making unnecessary mistakes.
Conclusion
Identify your soil texture and assess the slope of your terrain so you can choose the right remedy.
Map out the contours of your landscape, clean up the site, and collect useful debris for intentional use.
Shape your land the way it needs shaping—if issues need fixing.
Eliminate weeds and prevent them long-term by removing them and edging beds where necessary for sheet mulching, regular mulching, or both.
Plant pioneer trees to support the landscape.
Related Posts:
- How Much Will it Cost You to Start Your Food Forest?
- How Long Does It Take To Grow a Food Forest?
- How To Start a Community Food Forest Garden: Complete Guide
If you found this post helpful, please leave a comment! I’d love to know what kind of ground you’re up against and what challenges you’re presented with.
How to inoculate fresh mulch to produce food
Recent Posts
There’s no shortage of full-sun ground covers for zone 4 climates! Each plant in this list can withstand the frigid temperatures and also enjoy the hot sun in summer. Full sun means that a plant...
There's no shortage of full sun ground covers, not even in zone 3! Zone 3 climates offer hot but short-lived summers and very cold winters. So each plant in this list can withstand the frigid...