
This post may contain affiliate links. If you use these links to buy something we may earn a commission. Thanks.
An effective deer fence can’t be done quickly if you want to save money.
But the good news is that a deer fence brewed with patience will save you long-term time by preventing any do-overs or breaching issues.
Save money on a deer fence through long-term planning, local and long-lasting materials, and putting it up by yourself. Long-term plans prevent fix-up costs later, local materials don’t cost shipping, long-lasting materials need rare replacement, and doing it yourself saves thousands in hiring.
By following this guide, you’ll learn everything you’ll need for an effective fence, how to keep it cost-effective and prevent it from costing you later.
It’s vital not to ‘cheap out’ on most aspects of your fence as repairs are a hassle and can become expensive or difficult to fix.
Related: Schedule to Keep Deer Out of The Garden Without A Fence
Order deer-resistant shrubs, herbaceous perennials, bulbs, roses, and ground covers all in one place.
1. Choose long-lasting materials
Fence posts:
Galvanized steel fencing and T-posts may be a heavy cost up-front, but they are the longest-living materials for the job.
Sourcing T-Posts may be challenging if you want to get maximum height. To install T-posts, all you need is a post driver.
Most sources for these products are from a farmer’s supply outlet type distributor/retailer. They tend to carry 6-foot post heights and may require you to special order 8-foot heights.
We were lucky to find a local person selling their old 8′ deer-fence T-posts as their maple and birch mini-forest is now mature.
Fencing:
Galvanized steel fencing lasts a couple of lifetimes.
Its rolled allotments are usable on any post type you chose.
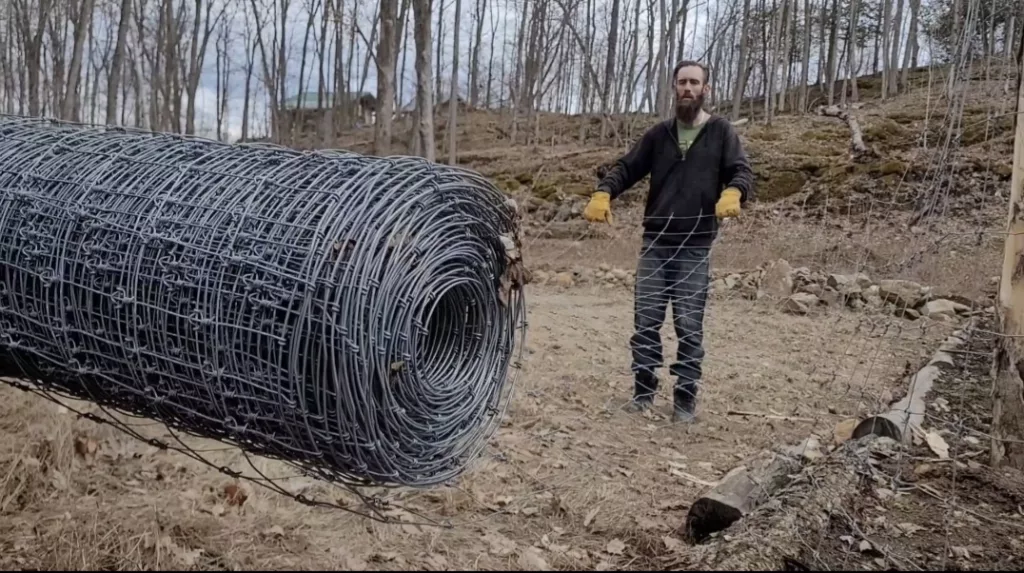
Steel wire can be cut with pliers and twisted around T-posts to secure.
Wood posts use up more wire to tie around, but staple fasteners can secure the fencing as an alternative.
- These will need to be hammered in and the ‘U’ shape can deflect your hammer until you get the knack of how to start and pound down.
- The staples need only be snug so that the wire mesh can expand and contract with changing elements.
2. Choose long-lasting installation techniques
Galvanized wire mesh fencing needs to be stretched tight as you go.
- Use a 2×4 or 4×4 full length of the height of your fencing to provide an even way to pull and tighten the fence
Extra posts, besides line posts, will be needed to create strong corners and ends. Gates will need to be placed between two of these end brace assemblies.
End brace assemblies consist of a cross brace on an angle and a top horizontal brace between the post tops.
The angled brace is going to have one end toward the bottom of the second last line post and the other end toward the top of the end line post.
This helps hold the top of the last end-line post from being pulled in and maintains the tension of the fence.
A tensioned fence is a less ugly and longer-lasting fence.
Usually, a turnbuckle is also used at the opposite angle of the end posts’ cross braces. This increases the security of this assembly and enables tensioning later if needed.
Without the turnbuckle, the second line post is still compromised. The tension of the fence pulls on the end line post and pushes the bottom hard enough to tilt the post and tension on the whole fence line is lost.
Maybe the turnbuckle needs a bit of explanation. Turnbuckles will require, minimally, two loops of wire used for fencing and can have
- (a) an actual hardware-style device to use for tensioning or
- (b) can simply be a short stick about a foot length
- long enough to make turning the wire over itself until the two wires twist toward it and pinch it between and you see and feel the tension increase. This lever stick can be left in the twisted wire for later tensioning as needed.
No matter which fencing choice is made, when running wire mesh, tensioning systems need to be used. Even if cementing your posts, they can still be compromised without the bracing system described above.
Long-lasting installation techniques make life much easier once the work is done.
3. Pick low-maintenance fencing
Maintenance gets expensive when you just want to be done with your fence. Avoid cheaping-out and costing yourself more maintenance.
Upfront costs and long-term upkeep costs both need to be in your budget.
- Steel materials are practically zero maintenance so a maintenance budget wouldn’t exist.
- Wood may need replacement when rotted if not maintained or properly primed
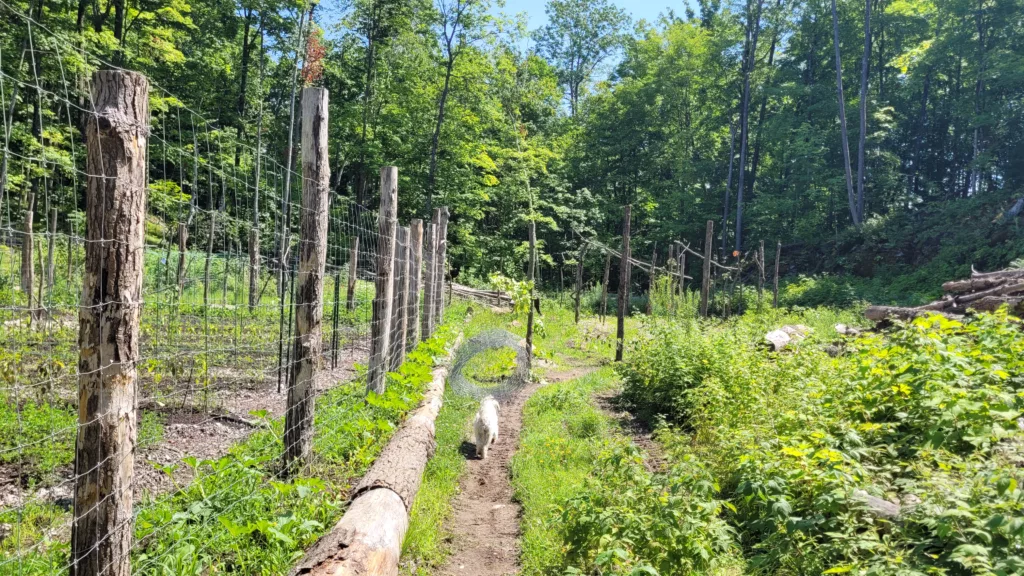
If you wish to use wooden posts (like we did) read #12!
Your choice of wood or steel also depends on the type of soil the posts are being set in. Thin steel posts aren’t going to hold up for very long in sandy loose soils. A thicker piece of wood makes more sense in that case for longevity’s sake.
Stickier soils with smaller particle sizes tend to make posts easy to remove and replace as it retains the hole. Pull the post, and simply drop a new same-sized one in.
A sagging fence is not ‘cheap’ to deal with.
4. Choose easy-to-install options
The cheapest deer fencing duo for longevity, maintenance, and installation works out to be galvanized steel wire and T-posts.
Digging or augering holes and pouring concrete, or slathering on tar, for wood posts costs more in both time and money than a simple hammer driver, ear muffs or plugs, and some T-posts.
Wood posts also require a lot more (high-cost) tools & labor for the job to be done—either machines or a long time shoveling.
Mesh netting and T-posts are also very easy to install. But mesh netting doesn’t last as long nor is as effective as steel wire.
See: Will Deer Chew Through Plastic Fencing? How To Avoid Damage
5. Choose high-value materials
If you’re looking to sell your home within 5-10 years you’ll need to decide:
- Will you pack up and bring your fencing material with you?
- Or invest in a fence to upgrade the property value?
If you plan to live in deer territory at your new place and need to keep deer out, once again, steel fencing and T-posts are easy to disassemble and bring with you. The ability to bring your fence with you to your new location is pretty high-value.
If adding a fence to your home is a worthy investment for your area, perhaps for privacy’s sake or other valuable reasons, consider a more permanent fence type.
The type of fence that adds the most value is an aesthetically pleasing, well-done, long-lasting fence.
If all you care about is a protected garden wherever you are going to be, consider an easy-to-pack-up-and-take-with-you fence.
- Steel posts are the best option for removing and reusing. They aren’t too difficult to pull compared to other posts.
- Wood posts are best removed and reused within 5 years of initial installation. After that, the fence should just stay as is.
We have pulled steel and wood posts with success over the years and easy removal boils down to the way they are set and the type of ground conditions they are set in.
6. Calculate necessary material quantities
Purchasing too little material can be just if not more expensive than purchasing too much!
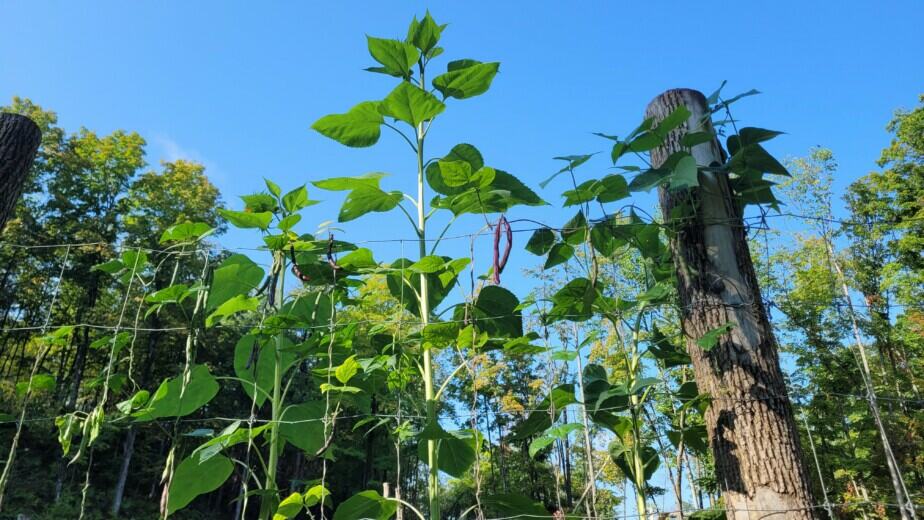
For a garden deer fence, overbuying a little bit isn’t always a waste as leftover material can become useful for plant trellises and other projects.
See: 11 Ways To Use Old (or Extra Left Over) Metal Fence
Buying too little material, such as a fence roll too short for the perimeter, might cause you to buy a lot more material than you need as they only come in large rolls.
To calculate your fencing materials:
You’ll need appropriate post spacing based on the material chosen.
For example, you’ll get away with fewer T-posts (spaced farther) when using plastic mesh netting than if you’re using steel wire. The weight of steel wire will require more posts with closer spacing to accommodate the weight and tension required.
In general, space deer fence posts 10-15 feet apart when using steel wire fencing. Lightweight polypropylene netting can have posts spread up to 20 feet.
To save money on this step:
- decide where you want your fencing corners to be for your garden.
- measure the distance
- and choose post spacing that creates ‘even’ spacing for all posts.
For example, if one side spans 70 feet, we can either do a post spacing of 10 feet (with 7 posts needed) or a post spacing of 14 feet (with 5 posts needed).
Personally with the above example, I would do 14-foot spacing with wooden posts or 10-foot spacing with steel T-posts.
7. Buy and hire at the right time of year
Materials are on sale when it’s off-season and contractors if needed, are available.
Pay attention to prices on-season and off-season and buy steel wire while it’s cheaper.
Of course, you can’t install a fence while the ground is iced over with snow, but during the warmer winter timeframe, you’ll even have spare time to do it yourself.
Contractors, if you’re planning to hire anyone, also aren’t likely to be charging premium rates.
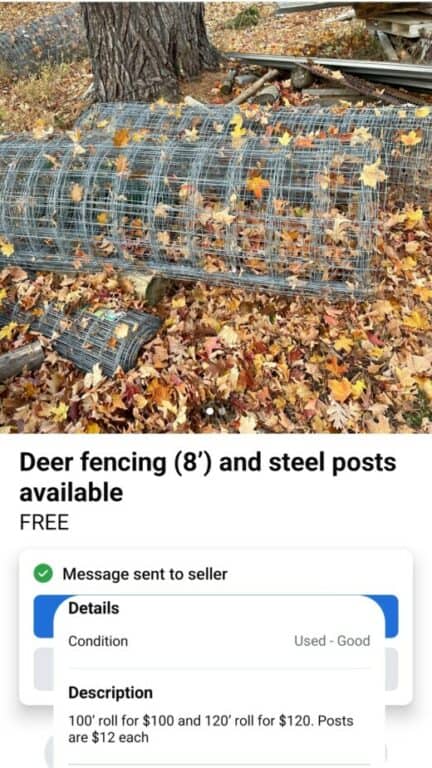
8. Find used steel fencing and T Posts
Watch marketplaces on buying platforms, farm suppliers, and make friends with farmers.
We scored deer fencing and x60 8-foot T-posts for half the price they’d be sold for new.
9. Make your own gate with free pallets
Pallets can be found free in lumber yards, garden centers, and anywhere that receives large shipments.
Heat-treated pallets are acceptable for use around gardens, aren’t painted with bright colors, and are labeled by an “HT” stamp.
As wood is becoming more and more expensive, pallets are often found free and supply an abundance of wood. You can take them apart as you wish and rebuild them using the lumber every which way.
10. Don’t space your posts too far
Avoid cutting costs by over-spacing posts as this will create a weak fence.
A weak fence is an ineffective and short-living fence.
The strength or weight of the materials is a key factor to consider for proper post spacing.
| Material types | T-post | Wood post |
| Plastic mesh | 20ft spacing | 20ft spacing |
| Steel mesh | 10ft spacing | 15ft spacing |
11. Don’t opt for a shorter fence to “save money“
It was a total failure when we re-used cheap 4-foot steel fencing. We thought we could just raise up a foot off the ground, and reinforce the top with our 9 gauge wire.
So we put 2 strands of wire on the top with 1-foot spacing between them and had 7 feet of “fence.”
Did it work? No, and we lost plenty of plants.
Deer have no issue crawling under 8 inches of space.
They can also jump 7 feet, even 8 feet; but usually don’t take a chance on an 8-foot fence since they can’t see if it’s actually taller.
If supplies for a tall fence are hard to find or beyond your budget, but you still want some protection, pick the highest option possible as any fence will help and can be reinforced for height in other ways.
Just avoid raising it from the ground for height. My hunter friends seem to believe that deer prefer crawling over jumping where the opportunity exists.
12. Harvest or find salvageable wood posts
- My grandfather often found farmers who wanted old buildings or barns to be torn down, and with them came useable wood for posts.
If we didn’t have an abundance of wood to cut ourselves, I’d be introducing myself to all the people with dilapidated buildings on their property and offering a helping hand in exchange to take the scrap material.
- If you, your family, or your friends have plenty of trees to spare, fresh-cut wood can be cut to custom lengths for appropriate posts at no additional cost other than time and useful tools to have.
- Even if you don’t know anyone with a woodland, check how much wood you’re allowed to cut from crown land per year and forage your own posts.
Before you cut a tree, identify and select hardwood species for long-lasting posts.
See: How to Identify & Select Wood for Mushroom Logs (With Pics)
- Since cutting trees isn’t entirely practical for most, Facebook marketplace often offers a lot of well-priced wood posts! Keep an eye out for them as many loggers (I’ve seen) sell posts cheaper than box-store pricing.
13. Seal Wood Posts the Old-Fashioned Way
Your bonus tip to save on deer fencing, if you’re using wooden posts, involves skipping concrete or premature rotting by sealing your posts the old-fashioned way with tar.
James Town Distributors explains that their pine tar product may contain creosote, so isn’t recommended for soapmaking.
Creosote or coal tar isn’t generally recommended to use in gardens for raised beds or trellising structures, as you’d be planting around what could become a contaminated site.
If your fencing, however, isn’t in the garden itself, and you won’t be planting vegetables along the fence line, pine tar is an effective way to preserve your wooden fence posts.
Coat the posts only as high as you plan to set them in the ground.
To coat the posts, follow the application instructions provided, apply several coats, and allow plenty of time to dry.
You’ll double, if not triple your wood post’s lifespan by taking the time to seal your wood from contact with the ground. In the long run, this is how you’ll save a lot of time and money on replacements that would otherwise be required.
A “cheap” fence is a well-done fence. Longevity and effectiveness is the key to lowering your costs.
A little more time prepping, planning, procuring material, and putting it up yourself is the best way to keep it cheap short term and long term.
If you don’t seal your wood, as we personally didn’t, expect to replace posts in as little as 5-12 years depending on the wood type and condition. We only chose not to since we have no shortage of wood and equipment that make replacement easy (but not cheap) and because our posts are in the garden.
Recent Posts
There’s no shortage of full-sun ground covers for zone 4 climates! Each plant in this list can withstand the frigid temperatures and also enjoy the hot sun in summer. Full sun means that a plant...
There's no shortage of full sun ground covers, not even in zone 3! Zone 3 climates offer hot but short-lived summers and very cold winters. So each plant in this list can withstand the frigid...