
This post may contain affiliate links. If you use these links to buy something we may earn a commission. Thanks.
Let’s back you up to the beginning so you can decide how to grow your own mushrooms at home as you are not limited to indoor cultivation if you have any space outdoors.
When deciding how to grow your own mushrooms at home you’ll first need to know that you can grow them in several ways.
Growing mushrooms at home can be done indoors in bins, buckets, or bags and boom rooms or outdoors on woodchips, logs, or manure! Most methods are easily done at home at a reasonable cost with minimal effort.
See the cost differences: What it Costs to Grow Mushrooms (Indoor vs Outdoor)
Below, you’ll learn what each method will require. You’ll learn which methods are best for your current circumstances based on the resources available to you.
Where is the best place to grow mushrooms at home?
If you’re looking to grow mushrooms at home, you’ll need to know the best places you can grow them and there is more than one!
The best places to grow mushrooms at home are in bins, a temperature-regulated room, a shed, a garage, or outside under a canopy. Each of these places can offer proper conditions for mushroom growth. Mushrooms grow in dark, cool, and humid environments, but when it’s time to fruit they need light.
We’ve grown mushrooms both indoors and outdoors in multiple ways, but the best method for you to grow mushrooms at home will be based on your situation, resources, and knowledge.
You can only try what you learn about, so learn about all the possible ways to grow mushrooms at home as we dive into the parameters of each method.
Each of the best ways to grow mushrooms at home has varying degrees of setup time and materials, cost-effectiveness, and production passivity.
What matters to you most?
- Simple set up
- Low cost
- Passive production
| Mushroom Grow Methods | Set up | Cost | Production |
| Bins (indoor) | Simple | Low | Active |
| Bags (indoor) | Medium | Medium | Active |
| Buckets (indoor/outdoor) | Medium | Low | Active |
| Woodchips/straw (outdoor) | Simple | Low | Passive |
| Logs (outdoor) | Hard | Medium | Very Passive |
| Manure (outdoor) | Simple | Low | Passive |
The values presented on the chart are based on average circumstances and some may or may not be true, for you. For example, growing mushrooms on logs isn’t ‘hard’ if you live in woodland and already have chainsaws. But if you don’t have those things, you can still grow mushrooms on logs, acquire the tools, and find fresh logs, it’ll just be a bit harder.
So to learn about which method is best for you, let your eyes soak up the details of each cultivation method. In 5 minutes, you’ll know the best ways to grow your own mushrooms.
The basic principle of how this all works:
Growing mushrooms requires several steps to make it cheaper to do, and all steps share the same goal: expand the mycelium on various mediums until they can produce sizable fruit.
The more steps you skip, the more money you’ll pay.
For example, a spray-and-grow kit allows you to skip all the steps of taking time to sterilize and make grain spawn. Buying liquid cultures allows you to make your own grain spawn for less cost, and then mix that grain into a larger volume of cheaper substrate. Bigger bags of substrate will yield more fruit per bag.
The step before liquid cultures is to take spores from mushrooms and grow them on a Petri dish.
From liquid cultures, you can make your own grain spawn or plug spawn for both indoor and outdoor uses.
Here are the best ways to grow mushrooms at home and the materials involved:
Bins (or tubs) indoors
Growing mushrooms at home indoors requires an enclosure to keep humidity levels up and fungi competition out (since various spores are floating everywhere).
Mushroom tubs are often referred to as “mono-tubs” where you grow one mushroom strain in a retrofitted tub. A tub takes up less space than a ‘BoomRoom’ filled with bagged spawn.
Tubs are reusable and simple to set up. Cleaning your mono-tub after each use, however, increases the active work required to grow the mushrooms.
Tubs are perfect for the small scale of feeding your in-home family.
If tubs are your chosen cultivation method, you’ll want to know what mushrooms you can grow in them, first.
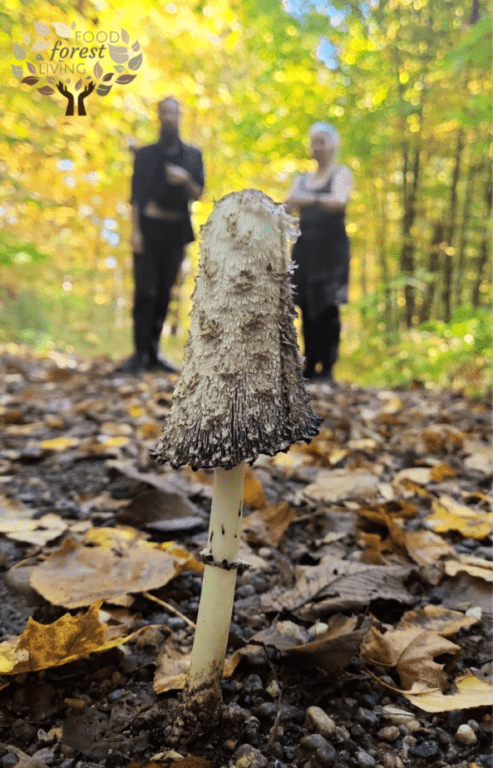
In tubs, you can grow top fruiting manure-loving and hardwood-loving mushrooms. Shaggy manes grow in manure and king oysters, pioppino, wine caps, enoki, and chestnut mushrooms grow in hardwood woodchips.
The cost of making a mono-tub includes the materials. You’ll need:
- Liquid cultures and injection port grain bags, or grain spawn, ($30-$60)
- or just get the liquid cultures and make your own grain spawn with empty bags and bulk-purchased grain.
- Liquid cultures
- Bulk grain (5lb – $27)
- Bags (50pcs – $20)
- or just get the liquid cultures and make your own grain spawn with empty bags and bulk-purchased grain.
- A ready-made mono-tub (way easier than DIYing, better results, and less materials needed) ($60)
- Reusable mono-tub filters ($8)
- 70% rubbing alcohol ($10)
- Finally, a substrate for the tub: manure or hardwood (choice depends on which mushroom you’re growing from your liquid cultures or spawn) ($30)
Total cost to get started: $138-$168
After you have this setup, your ongoing costs are much lower.
To continue producing mushrooms in your tub, you’ll still have lots of rubbing alcohol, and liquid culture left over for numerous rounds of mushrooms. You’ll already have the reusable tub and filters.
All you’ll need to restock is substrates (manure or hardwood) for the tub, and grain for making spawn.
Each time you grow mushrooms in your tub, you’ll get multiple flushes of mushrooms (if nothing becomes contaminated in the process).
Clean the tub and filters each time and use sterile substrates.
the drawback of mono-tubs is “mono.” You can only grow one type at a time unless you invest in multiple bins.
Bags indoors
If you want to grow a wide range of gourmet mushroom types and multiple at once, growing in bags (fruiting blocks) with a tent will be the better option. The startup cost, however, is a bit more than a mono-tub.
But you’ll grow various mushrooms at once in a compact space—unless you’d like to build yourself a whole mushroom room!
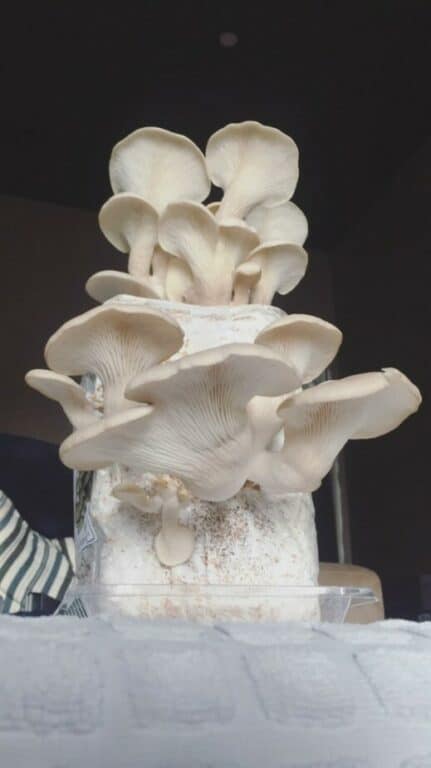
The setup for growing mushrooms in bags requires an enclosure that can hold a dozen or more ‘fruiting bags.’
A fruiting bag is where inoculated substrate is contained and will fruit 2-3 flushes of mushrooms. These blocks go into your tent. A proper environment for them to grow and fruit. You’ll have various oysters, lion’s mane, chestnut, shiitake, and more types of mushrooms all growing at once.
The “BoomRoom” is a cost-effective and easy setup with clear and straightforward instructions. Most DIY mushroom tents cost just as much if not a little more than this kit. (Plus you can also use QUALITYSPAWN for a discount).
DIY tents certainly cost more time. Ensuring you get the parts and functions can quickly become overwhelming if you’ve never done this before.
The cost (of time and often money) is cut down when ordering a tent kit.
- Tent kit ($326.70 after discount)
- Fruiting blocks ($30ea) or make your own blocks with bulk-bought grain/substrate, bags, and liquid cultures.
Fruiting blocks sold by Northspore are bigger than their “spray and grow” kits so you’ll get more mushrooms off a fruiting block in a tent than their taste-tester kits.
Liquid cultures offer multiple uses per syringe. Buying liquid cultures, substrates, and bags in bulk growing mushrooms at home becomes very fair.
You could make a cheaper kit with less tech, but you’ll likely run into more issues with growing mushrooms and end up with lesser results.
Compared to tubs, the process of growing mushrooms in bags offers a greater success rate, more mushroom varieties to grow, and more bang for your buck long term.
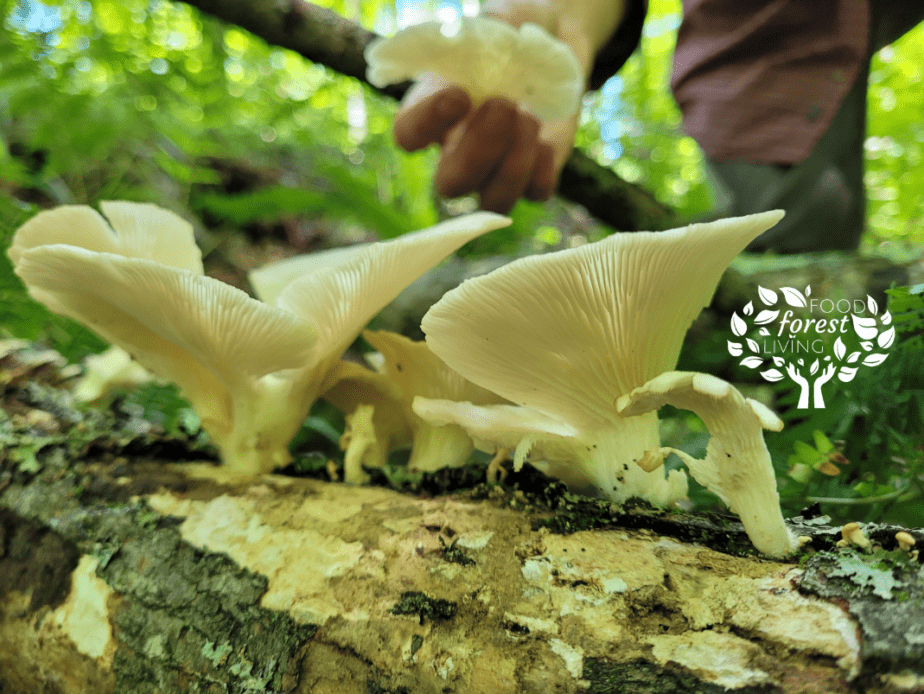
In bags, you can grow all the fancy gourmet mushrooms: oysters of all kinds, lion’s mane, and shiitake, as they can grow from the sides as well as tops. Be sure to provide whichever mushroom you choose with the ideal substrate.
To make your own fruiting blocks:
- Make or buy grain spawn
- Buy grain spawn
- Make with:
- Liquid cultures
- Bulk grain (5lb – $27)
- Jars (50pcs – $20)
- Mix the ready grain spawn with a substrate (sterilized straw, sawdust, etc) in filter patch bags to make fruiting blocks.
Buckets in or outdoors
Buckets are basically the same as the above methods. You’ll need some kind of spawn either bought or made by you.
The difference between buckets and bags is less waste and your buckets are washable and reusable, unlike bags.
Perhaps you’ll also have a garage or other appropriate space to place your buckets so they can grow and fruit in suitable temperatures.
It may be more difficult to get a 100% success rate with buckets as you need to ensure everything is clean in between and that you have a suitable growing environment.
The BoomRoom tents make for a seamless environment.
You’ll also need to retrofit your buckets to be suitable for colonizing and fruiting.
Spencer has grown mushrooms in buckets and shows you step-by-step how he does it.
Woodchips or straw outdoors
Growing mushrooms outdoors is our favorite. It’s the least complicated, in our experience.
Mushroom beds are very simple to set up and quite low cost.
Especially if you have access to woodchips, straw, or both! Even additions such as sawdust and leaves can help you get fruit over a shorter and longer-term period.
We mix straw and woodchips in our beds because we get early flushes and late flushed while having made the bed once. Each year, we top up the bed with fresh material.
If woodchips and straw are fresh, there’s no need to sterilize the materials.
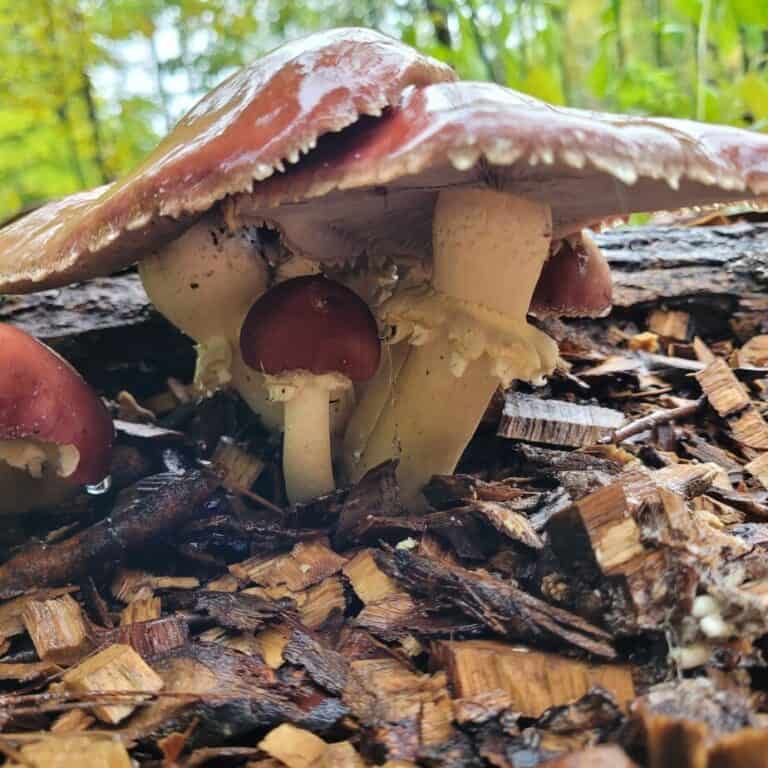
Beds, however, can’t grow every mushroom that a log can.
We grow winecap mushrooms (pictured) in our mushroom beds throughout our gardens. Winecaps (also known as King Stropharia) are the easiest to grow in beds. You can also grow oyster, elm oyster, shaggy mane, or pioppino mushrooms.
The setup for growing mushrooms on woodchips or straw is as simple as obtaining quality spawn and fresh chips or straw. (use QUALITYSPAWN for a discount)
If you have a lot of space and wish to expand your mushroom beds, you can get liquid cultures and make your own grain spawn.
Simply add bulk grain to a filter bag, inject with liquid culture, wait until it’s white (fully colonized) then mix this into your bed outside.
In layers, add straw, spawn, woodchips, and repeat. Water each layer as you go, but don’t drench it. Ensure your beds are kept moist, but not wet.
We simply purchased a bag of grain spawn, mixed it into out beds, waited 6 months, and 2 years later we still have mushrooms fruiting!
We spent $60 on ready-grain spawn to make 3 mushroom beds.
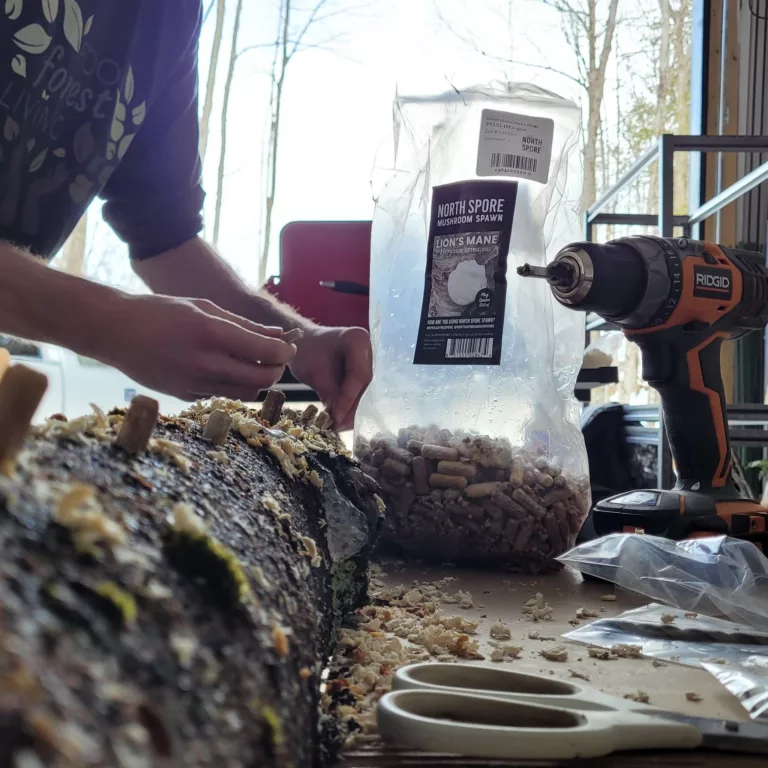
Logs outdoors
Mushroom logs are upfront work, but the most passive and rewarding way to grow mushrooms long-term.
If you want to grow shiitakes, lion’s manes, chicken of the woods, hen of the woods, and more, logs are the best choice. (And completely worth the effort.)
We have logs ranging from 2-10 inches in width. The small ones will fruit sooner than the larger ones, but also expire quicker.
As the small logs quickly produce mushrooms, we have something while we wait for the big logs to fruit later. Once the big logs fruit, the small logs will be approaching their expiration date.
Once the small logs have expired (no longer produce mushrooms) the larger logs will produce for 6-10 years onward.
So our plan is to continue making a set of large mushroom logs every year for a continued and growing supply of gourmet mushrooms.
For a complete guide on the setup involved with growing mushroom logs, see: How to Use Mushroom Plugs Step by Step for Big Harvests
You’ll need mushroom plugs, fresh healthy logs, and various tools.
Once you have the tools, all you’ll need to potentially buy again is gas or power for your chainsaw, wax, mushroom plugs (or make your own to reduce costs), and a way to get new healthy hardwood logs.
Manure outdoors
The setup to grow mushrooms in manure outdoors is similar to woodchip or straw beds. Instead, you’re using manure and manure-loving mushroom species.
When you set up a manure mushroom bed, I recommend mulching it over with straw so it doesn’t dry up too quickly. Simply set out a mound of local manure in layers with your mushroom spawn, water well, and mulch.
The cost is only as much as a bag of spawn and the manure you’re able to find. It helps to put sides on a manure bed to keep it from drying up too quickly, so logs or wooden planks can be used to make ‘sides’ to contain the pile of inoculated manure.
Add manure each year to keep your manure mushroom bed growing! The process is pretty passive.
Up Next: Practical Gifts for Mushroom Lovers, Foragers & Foodies
Recent Posts
There’s no shortage of full-sun ground covers for zone 4 climates! Each plant in this list can withstand the frigid temperatures and also enjoy the hot sun in summer. Full sun means that a plant...
There's no shortage of full sun ground covers, not even in zone 3! Zone 3 climates offer hot but short-lived summers and very cold winters. So each plant in this list can withstand the frigid...